Table of Contents
Here I will explain how I develop on STM32 F1 series MCUs.
This is an ARM Cortex-M3 based microcontroller. It was finally time to step up from the classical 8-bit Atmel AVR microcontroller. These 32-bit microcontroller are more powerful, and cheaper.
board
You can get STM32 F1 boards for under 5$, mostly based on the STM32F103 series. Here are just some of them which I have.
For more powerful STM32 micro-controllers I recommend using the evaluation boards from ST. They are well designed, documented, and you get quite some bangs for the bucks.
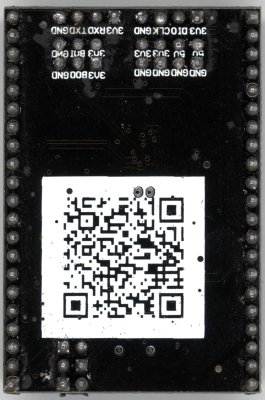
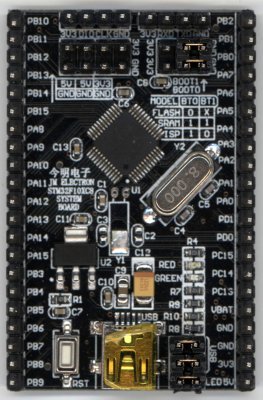
system board
The JM electron (JinMin Electronic) system board (product sheet) has:
-
- STM32: 32-bit ARM
- F: general purpose
- 103: medium density (performance line)
- C: 48 pins
- 8: 64 kB flash
- T: LQFP
- 6: -40 to 85 °C
- peripherals:
- 2×21 GPIO pins on the side (all MCU pins are accessible)
- USB mini-B (can be disconnected using jumpers)
- USART1 on the top right (to flash using USART ISP)
- SWD on the top left (to flash using SWD)
- boot select on the top right
- power connection on the top left (for power output)
- power LED
- user LED, on pin 11/PA1 (can be disconnected using a jumper)
- reset button (NRST)
advantages:
- separate SWD and UART pins
- additional 3.3V, 5V, and GND pins
- selectable boot
- selectable USB, LED pins
drawbacks:
- unpopulated 32.786 kHz clock
- no user button
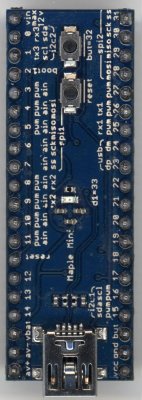
maple mini
The LeafLabs Maple Mini has:
-
- STM32: 32-bit ARM
- F: general purpose
- 103: medium density (performance line)
- C: 48 pins
- B: 128 kB flash
- T: LQFP
- 6: -40 to 85 °C
- peripherals:
- 2×20 GPIO pins on the side (not all GPIO pins are accessible)
- USB mini-B (can be disconnected using jumpers)
- power LED
- user LED, on pin 19/PB1
- reset button, on pin 7 NRST
- user button, on pin 45 and 44/PB8 and BOOT0 (allowing to flash using ICP)
- USB disconnect circuit, on pin 46/PB9
advantages:
- schematic and layout files are available (and open source)
- proper USB disconnect circuit (useful for using the DFU bootloader it comes with)
- small
- good analog design
- more flash (128 vs 64 kB)
- small, fits breadboard (600 mil wide)
drawbacks:
- no 5V pin
- no additional connections (SWD, power, GND)
- the pin silkscreen are not the chip pins (you always need the schematic at hand)
- the clones don't provide a second voltage regulator for the analog part
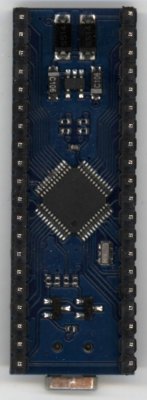
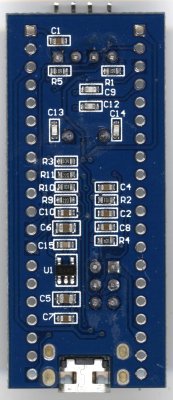
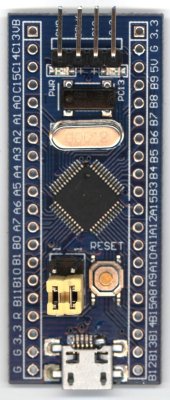
blue pill
This cheap board is often referred as blue pill in forums and sold under $2.50. It has:
-
- STM32: 32-bit ARM
- F: general purpose
- 103: medium density (performance line)
- C: 48 pins
- 8: 64 kB flash
- T: LQFP
- 6: -40 to 85 °C
- peripherals:
- two 1×20 GPIO pins headers on the side (most MCU pins are accessible)
- USB micro-B
- SWD on the top
- boot select
- power LED
- user LED, on PC13 (warning: switching this LED heavily affects the RTC)
- reset button (NRST)
- 32.768 kHz real time clock (RTC)
advantages:
- very cheap (<$2.50)
- SWD header
- small, fits breadboard (600 mil wide)
- comes with RTC
drawbacks:
- no user button
- board extends over headers
- the RTC is not stable when the on-board LED is toggled
Here a rough schematic, but there a many derivatives. Mine for example has a 10 kΩ pull-up (to 3.3 V) resistor on USB D+/PA12 instead if a 4.7kΩ (to 5 V), although USB devices use a 1.5 kΩ resistor to pull up (to 3.3 V) usually.
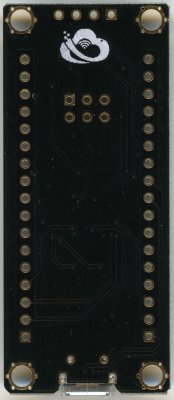
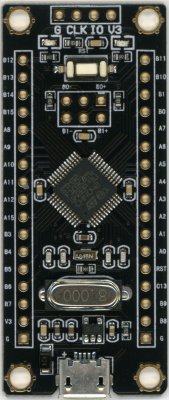
black pill
the black pill is a “fixed” version of the blue pill, but I find it quite inferior.
advantages:
- correct 1.5 kΩ pull-up resistor on USB D+
- RTC is usable at the same time as the LED
- has 4 mounting holes
- USB input diode protection
changes:
- LED is on PB12 (sink to enable it)
- different pinout
drawbacks:
- larger
- same length but with less pins
- only one 3.3V pin (instead of 2 on the blue pill)
- no 5V pin
- no VBAT pin
- one less GND pin
- no C15 and C14 pin (used for OSC32)
core board
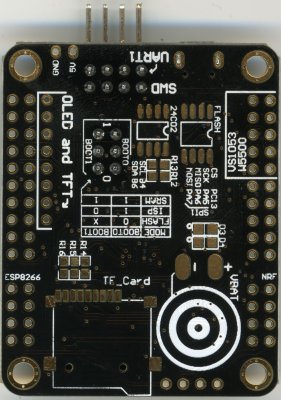
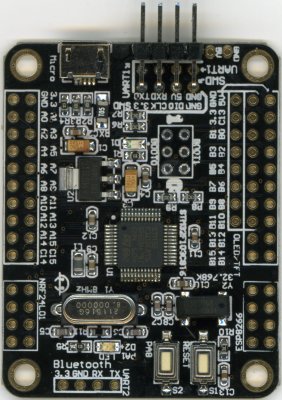
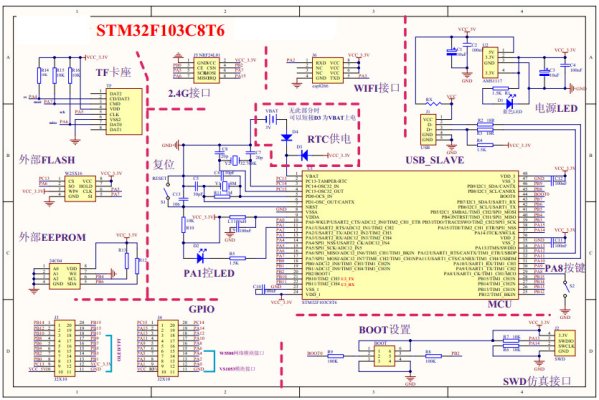
You can often find this versatile board for $6 by searching for “51 core board”.
It has:
-
- STM32: 32-bit ARM
- F: general purpose
- 103: medium density (performance line)
- C: 48 pins
- 8: 64 kB flash
- T: LQFP
- 6: -40 to 85 °C
- peripherals:
- two 2×10 GPIO pin headers on the side (most MCU pins are accessible)
- USB micro-B
- 2×3 SWD+UART port
- boot select
- power LED
- user LED, on PA1
- reset button (NRST)
- user button (PA8)
- 32.768 kHz real time clock (RTC)
It offers quite a lot of peripheral options:
- 2×4 header for the ESP-01 WiFi module (base on the ESP8266)
- 2×4 header for the nRF24L01 transceiver module
- 1×4 header for a Bluetooth module (using as UART port)
- 1×8 header for an OLED/TFT screen
- 2×5 header for a VS1053/W5500 Ethernet module
- space and pads for a CR1220 coin cell (with knife pins) connected to VBAT (for the the RTC circuit of the micro-controller), but don't forget to also add the two diodes (D3 and D4)
- footprint for a flash chip (W25xxx, SOP-8) connected to an SPI port (SPI1)
- footprint for a EEPROM chip (24Cxx, SOP-8) connected to an I2C port (I2C1), but don't forget to add the pull-up resistors (R12 and R13)
- footprint for a micro-SD card slot connected to an SPI port (SPI1), but don't forget to add the pull-up resistors (R14, R15, and R16)
advantages:
- user LED and button
- large AMS1117 voltage regulator
- fuse on USB 5V
- separate 5V connection
- SWD+UART header (ideal for the black magic probe)
- RTC oscillator included
- compact (42×53 mm)
- M3 mounting holes
drawbacks:
- very few power pins
warning: on the board silkscreen SWDIO and SWCLK are swapped
flashing
Flashing refers to programming your application into flash, so the micro-controller can run it. There are several ways to program the flash, as explained in PM0075 (archive):
- In-Circuit Programming (ICP): using SWJ (serial wire and JTAG) or the embedded bootloader. This mechanism is provided natively by the micro-controller
- In-Application Programming (IAP): using a custom application which can write into flash. But for that you first need to flash this application (often called boot loader) using an ICP method
It's also possible to program it into RAM and run it from there, but this is not the focus here. The disadvantage is that the program will not remain in RAM when the micro-controller is reset, so you will need to program it a every start. There is also less RAM than flash on these micro-controllers, limiting the size of your application. But if you are interested, the documents referred in this section provide the information you need.
ICP
In-Circuit Programming methods:
- embedded bootloader: simple but slow
- SWJ: complex but fast, and allows debugging
embedded bootloader
The STM32 micro-controller come with a embedded bootloader stored in ROM which allows you to program the flash using simple communication protocols like USART, I2C, … How to start this bootloader is described in AN2606 (archive).
The STM32F1xx all provide a USART1 bootloader, using the simplest protocol. For the STM32F103 you can start the bootloader the following way:
- apply pattern 1 to start bootloader (clause 12): boot0=1, boot1=0 (clause 3, table 2)
- on the board connect the boot1 jumper to 3V3 and the boot0 jumper to GND
- power the micro-controller
- this loads the bootloader located in the system memory at 0x1FFFF000 (clause 12, table 22)
Now you can send the firmware:
- connect a USB to UART converter to the USART1 pins on the board (for the STM32F103 USART1_TX is PA9 and USART1_RX is PA10)
- several software implementing this protocol are available:
- ST provides a flash loader (only for Windows)
- I use stm32loader (original post) to send the application (it can also read, verify, erase, …):
./stm32loader.py -e -w -v firmware.bin
You can then run the programmed application (e.g. after flashing it) by sending the go command to the bootloader (the script already does it). As long as pattern 1 is applied the bootloader is started when the micro-controller boots. Connect back the boot0 and boot1 pins to GND for your application to boot directly.
SWJ
SWJ is a combination of Serial Wire Debug (SWD) and JTAG. SWD is a more modern version of JTAG and only requires 2 pins instead of 5. But they both allow you to debug hardware: read/write memory (including flash), control the I/O, and debug the running code.
You first need a SWD or JTAG adapter. I am using a ST-Link V2, which I connect on the SWD debug port (SWD-DP): SWDIO is on PA13, SWCLK is on PA14. Don't forget to add a udev rule to allow the user to access the SWD adapter:
sudo tee /etc/udev/rules.d/60-st-linkv2.rules << EOF
# STMicroelectronics ST-LINK/V2
SUBSYSTEM=="usb", ATTR{idVendor}=="0483", ATTR{idProduct}=="3748", MODE:="0664", GROUP="plugdev", SYMLINK+="st-link_v2"
EOF
sudo service udev reload
To control the SWD adapter several software are available:
st-link
stlink is a dedicated tool for the ST-Link V2 SWD adapter and STM32 micro-controllers.
To install st-link:
git clone https://github.com/texane/stlink.git
cd stlink/
./autogen.sh
./configure
make
To write the firmware at 0x0800 0000 (the flash memory start address) you can simply use:
./st-flash write firmware.bin 0x08000000

2016-02-14T10:56:33 INFO src/stlink-common.c: Loading device parameters....
2016-02-14T10:56:33 INFO src/stlink-common.c: Device connected is: F1 Medium-density device, id 0x20036410
2016-02-14T10:56:33 INFO src/stlink-common.c: SRAM size: 0x5000 bytes (20 KiB), Flash: 0x20000 bytes (128 KiB) in pages of 1024 bytes
2016-02-14T10:56:33 INFO src/stlink-common.c: Attempting to write 7100 (0x1bbc) bytes to stm32 address: 134217728 (0x8000000)
Flash page at addr: 0x08001800 erased
2016-02-14T10:56:33 INFO src/stlink-common.c: Finished erasing 7 pages of 1024 (0x400) bytes
2016-02-14T10:56:33 INFO src/stlink-common.c: Starting Flash write for VL/F0/F3 core id
2016-02-14T10:56:33 INFO src/stlink-common.c: Successfully loaded flash loader in sram
  6/6 pages written
2016-02-14T10:56:33 INFO src/stlink-common.c: Starting verification of write complete
2016-02-14T10:56:34 INFO src/stlink-common.c: Flash written and verified! jolly good!
What is useful is that it show some information about the chip at the beginning.
You can also get this information using ./st-info.
You can also use it combination with GDB to debug or flash images:
- start the st-util server:
./st-util

INFO src/stlink-common.c: Loading device parameters....
INFO src/stlink-common.c: Device connected is: F1 Medium-density device, id 0x20036410
INFO src/stlink-common.c: SRAM size: 0x5000 bytes (20 KiB), Flash: 0x20000 bytes (128 KiB) in pages of 1024 bytes
INFO gdbserver/gdb-server.c: Chip ID is 00000410, Core ID is  1ba01477.
INFO gdbserver/gdb-server.c: Target voltage is 3288 mV.
INFO gdbserver/gdb-server.c: Listening at *:4242...
- start GDB with the firmware to flash/debug, connect to st-util, flash the image:
arm-none-eabi-gdb firmware.elf

...
Reading symbols from firmware.elf...done.
(gdb) tar extended-remote :4242
Remote debugging using :4242
0x0800016c in ?? ()
(gdb) load
Loading section .text, size 0x85d8 lma 0x8002000
Loading section .ARM.exidx, size 0x8 lma 0x800a5d8
Loading section .data, size 0x8b4 lma 0x800a5e0
Start address 0x80043fc, load size 36500
Transfer rate: 9 KB/sec, 7300 bytes/write.
OpenOCD
OpenOCD is a more general tool than st-link. It supports numerous adapters and micro-controllers (targets). You just have to specify what you are using.
To use OpenOCD:
- install OpenOCD:
sudo apt-get install openocd
- start openOCD and specify the adapter we are using and micro-controller we want to control :
openocd --file interface/stlink-v2.cfg --file target/stm32f1x.cfg
- connect to openOCD to open a session:
telnet localhost 4444 - in this session reset and halt the MCU:
reset halt
- you can dump the current flash content (from 0x0800 0000 to 0x0801 ffff):
dump_image dump.bin 0x08000000 0x1ffff
- and write the firmware at 0x0800 0000 (the flash memory start address). firmware.bin must be in the working directory where you started openOCD:
flash write_image erase firmware.bin 0x08000000
You can also use this openOCD one-liner to flash a firmware:
openocd --file interface/stlink-v2.cfg --file target/stm32f1x.cfg --command "init; reset halt; flash write_image erase firmware.bin 0x08000000; reset run; exit"

Open On-Chip Debugger 0.10.0-dev-00022-g2dcf7bf (2015-08-15-12:17)
Licensed under GNU GPL v2
For bug reports, read
	http://openocd.org/doc/doxygen/bugs.html
Info : auto-selecting first available session transport "hla_swd". To override use 'transport select <transport>'.
Info : The selected transport took over low-level target control. The results might differ compared to plain JTAG/SWD
adapter speed: 1000 kHz
adapter_nsrst_delay: 100
none separate
Info : Unable to match requested speed 1000 kHz, using 950 kHz
Info : Unable to match requested speed 1000 kHz, using 950 kHz
Info : clock speed 950 kHz
Info : STLINK v2 JTAG v17 API v2 SWIM v4 VID 0x0483 PID 0x3748
Info : using stlink api v2
Info : Target voltage: 3.520939
Info : stm32f1x.cpu: hardware has 6 breakpoints, 4 watchpoints
target state: halted
target halted due to debug-request, current mode: Thread
xPSR: 0x01000000 pc: 0x0800016c msp: 0x20005000
auto erase enabled
Info : device id = 0x20036410
Info : flash size = 64kbytes
target state: halted
target halted due to breakpoint, current mode: Thread
xPSR: 0x61000000 pc: 0x2000003a msp: 0x20005000
wrote 7168 bytes from file firmware.bin in 0.445909s (15.698 KiB/s)
Like with st-link you can also use OpenOCD as a GDB back-end to flash the firmware or debug it.
IAP
Instead of always having to use one of the ICP methods (UART or SWD), it would be nice to be able to flash using an more convenient way (i.e. over USB). This is possible by flashing the first time using ICP an additional application able to communicate (i.e. over USB) and program the flash. This is called In-Application Programming (IAP), and these applications are often called bootloaders.
Device Firmware Upgrade (DFU) is an official USB device class specifically designed for such cases. And will use a bootloader application which provided this capability (flashing over USB).
USB DFU
There are several USB DFU bootloaders available (one from STMicroelectronics themselves, or the open source STM32duino-bootloader), but I developed my own because I wanted to know how DFU works.
Here I will explain how to use USB DFU with the STM32duino-bootloader because it provides binaries for numerous development boards (while mine supports only a few, needs to be configured, and must compiled), but for other DFU bootloaders just replace with the corresponding USB ID.
If you want to make use of USB in your actual application after the bootloader started it, don't forget to force re-enumerating USB so the host computer sees the new interface:
- you can do this on the board by signalling a USB reset. On the maple mini there is a dedicated circuit. On generic boards you can pull USB D+/PA12 low for a short time
- you can also force this on the host using usb-reset:
sudo ./usb-reset "/dev/bus/usb/$(lsusb |grep "1eaf" |awk '{print $2,$4}'|sed 's/\://g'|sed 's/ /\//g')" >/dev/null 2>&1
To flash using the USB DFU bootloader:
- download the STM32duino booloader for your board
- with LED on PA1 for the system board
- maple_mini for the maple mini
- with LED on PC13 for the blue pill
- flash bootloader (at 0x0800 0000) using ICP
- install DFU-util (>=0.8):
sudo apt-get install dfu-util
- install the rules to allow users to use the DFU devices:
sudo tee /etc/udev/rules.d/45-maple.rules << EOF
# LeafLabs STM32 DFU USB
SUBSYSTEMS=="usb", ATTRS{idVendor}=="1eaf", ATTRS{idProduct}=="0003", MODE:="0664", GROUP="plugdev", SYMLINK+="maple"
SUBSYSTEMS=="usb", ATTRS{idVendor}=="1eaf", ATTRS{idProduct}=="0004", MODE:="0664", GROUP="plugdev", SYMLINK+="maple"
EOF
sudo service udev reload
- restart the board:
- remove flashing device
- re-plug USB
- the board should enumerate as DFU device. verify in the logs:
tail -f /var/log/syslog

...
usb 2-3.1: new full-speed USB device number 125 using xhci_hcd
usb 2-3.1: New USB device found, idVendor=1eaf, idProduct=0003
usb 2-3.1: New USB device strings: Mfr=1, Product=2, SerialNumber=3
usb 2-3.1: Product: Maple 003
usb 2-3.1: Manufacturer: LeafLabs
usb 2-3.1: SerialNumber: LLM 003
...
- check the available DFU profiles:
dfu-util --list

dfu-util 0.8

Copyright 2005-2009 Weston Schmidt, Harald Welte and OpenMoko Inc.
Copyright 2010-2014 Tormod Volden and Stefan Schmidt
This program is Free Software and has ABSOLUTELY NO WARRANTY
Please report bugs to dfu-util@lists.gnumonks.org

Found DFU: [1eaf:0003] ver=0201, devnum=4, cfg=1, intf=0, alt=2, name="STM32duino bootloader v1.0  Upload to Flash 0x8002000", serial="LLM 003"
Found DFU: [1eaf:0003] ver=0201, devnum=4, cfg=1, intf=0, alt=1, name="STM32duino bootloader v1.0  Upload to Flash 0x8005000", serial="LLM 003"
Found DFU: [1eaf:0003] ver=0201, devnum=4, cfg=1, intf=0, alt=0, name="STM32duino bootloader v1.0  ERROR. Upload to RAM not supported.", serial="LLM 003"
- you can flash the firmware (at 0x800 2000):
dfu-util --verbose --device 1eaf:0003 --cfg 1 --intf 0 --alt 2 --download firmware.bin

dfu-util 0.8

Copyright 2005-2009 Weston Schmidt, Harald Welte and OpenMoko Inc.
Copyright 2010-2014 Tormod Volden and Stefan Schmidt
This program is Free Software and has ABSOLUTELY NO WARRANTY
Please report bugs to dfu-util@lists.gnumonks.org

dfu-util: Invalid DFU suffix signature
dfu-util: A valid DFU suffix will be required in a future dfu-util release!!!
Opening DFU capable USB device...
ID 1eaf:0003
Run-time device DFU version 0110
Claiming USB DFU Interface...
Setting Alternate Setting #1 ...
Determining device status: state = dfuIDLE, status = 0
dfuIDLE, continuing
DFU mode device DFU version 0110
Device returned transfer size 1024
Copying data from PC to DFU device
Download	[=========================] 100%         7100 bytes
Download done.
Sent a total of 7100 bytes
state(8) = dfuMANIFEST-WAIT-RESET, status(0) = No error condition is present
Done!
- after the device is powered you have 0.5 seconds to flash the firmware before if starts the main firmware
developing
There are several ways to develop code, from device optimised low level up to abstract cross-family high level, including:
- by written directly in the registers as documented in the STM32F1XX reference manual and Cortex-M3 programming manual (STM32Snippets are only available for the F0 and L0 families)
- using the ST provided Standard Peripheral Libraries (with no specific license), or libopencm3 (with LGPL license)
- using the Arduino IDE for STM32, based on the Mapple IDE
- based on the STM32Cube platform (BSD license)
- by developing applications for embedded OSs
A good introduction on developing, particularly if you plan to use the Standard Peripheral Library (SPL), is Geoffrey Brown's Discovering the STM32 Microcontroller.
I am using libopencm3 because it's very make and gcc-arm friendly (the development environment I am using), and comes with plenty of examples. I still keep the reference manual open to check what registers are used.
debugging
Here are methods I use to debug my firmware, in increasing order of difficulty and power.
LED
Most of the development boards come with a user LED connected to a GPIO. Switching it on an off is pretty easy. I use it to show a current state (on/off) or activity (toggling).
The advantage is that you can also use it in interrupt service routines, or see the signal on the oscilloscope (to measure the speed, frequency, or use it as trigger).
prinft
The LED is pretty simple but also very limited. The next step is printing messages on the console about what is being done. For the communication I use a USART port. They are easy to configure and run, reliable, and simple to connect to. It's also fast enough to send debug messages.
With these messages I can show multiple states, the history of events, and ongoing actions. But don't use USART in interrupt service routines. That just creates a mess.
GDB
The GNU debugger GBD is a common tool used to debug software.
Often it's used to debug local computer software, but it can also be used to debug software running on a remote micro-controller. For that you just need as SWJ adapter to be able to control the hardware, and software making use of this adapter such as st-link and OpenOCD. Then tell GDB to connect to this remote target, through this SWJ software.
Here a quick example using OpenOCD:
arm-none-eabi-gdb --eval-command="target remote | openocd --file interface/stlink-v2.cfg --file target/stm32f1x.cfg --command \"gdb_port pipe; init\"" firmware.elf

...
Reading symbols from firmware.elf...done.
Remote debugging using | openocd --file interface/stlink-v2.cfg --file target/stm32f1x.cfg --command "gdb_port pipe; init"
Open On-Chip Debugger 0.10.0-dev-00189-g554313b (2016-01-12-16:26)
...
Info : STLINK v2 JTAG v17 API v2 SWIM v4 VID 0x0483 PID 0x3748
Info : using stlink api v2
Info : Target voltage: 3.286573
Info : stm32f1x.cpu: hardware has 6 breakpoints, 4 watchpoints
Info : accepting 'gdb' connection from pipe
Info : device id = 0x20036410
Info : flash size = 128kbytes
undefined debug reason 7 - target needs reset
0x00000000 in ?? ()

(gdb) monitor halt
stm32f1x.cpu: target state: halted
target halted due to debug-request, current mode: Thread
xPSR: 0x21000000 pc: 0x08002314 msp: 0x20004f80
stm32f1x.cpu: target state: halted
target halted due to debug-request, current mode: Thread
xPSR: 0x21000000 pc: 0x08002314 msp: 0x20004f80

(gdb) backtrace
#0  0x08002314 in main () at main.c:193

(gdb) frame
#0  0x08002314 in main () at main.c:193
193				__WFI(); // go to sleep
This is pretty useful to check the state (to figure out where the code runs havoc) and control the flow, even in interrupt service routines.
SWO
TODO

