This is an old revision of the document!
Table of Contents
JTAG is a technology to test integrated circuits, mostly micro-controllers and CPUs.
It allows to do hardware debugging: read/write memory, control I/Os, and debug running code.
SWD is a more modern version of JTAG and only requires 2 pins instead of 4[+1].
SWJ is a combination of Serial Wire Debug (SWD) and JTAG.
But they provide the same logical functions.
On one side this functionality must be included in the target device. The Debug Port is often called JTAG-DP for JTAG and SW-DP for SWD. SWJ capable device include and often combine both, as the SWD signal pins SWDIO and SWCLK re-use the JTAG signal pin JTMS and JTCK (backwards compatible). Most 32 bits micro-controllers and SoCs have one of both (or both).
On the other side you need a SWJ adapter so the host can speak to the device using the JTAG and/or SWD protocol. SWJ adapters can go from cheap (<5$) to expensive (>1000$), depending on the quality of the hardware and software.
SWJ adapters
These are the main SWJ adapters I am using.
ST-Link v2
The ST-LINK/V2 is from STMicroelectronics, and is very convenient to flash their STM8 and STM32 micro-controllers, such as the STM32 F1 series. It supports JTAG, SWD, and SWIM (for STM8).
These SWJ adapters are based STM32F1xx ARM Cortex M3 micro-controllers. And ironically enough I in turn use them to program and debug STM32F1xx ARM Cortex M3 micro-controllers.
First add the rules for normal users to be able to access the device (udev rule based on the VID and PID shown by lsusb). This has only to be done once, before the device is plugged in to be used:
echo -n 'ST-Link V2 SWJ adapter' | sudo tee -a /etc/udev/rules.d/60-st-linkv2.rules
echo -n 'ATTR{idVendor}=="0483", ATTR{idProduct}=="3748", MODE="0666"' | sudo tee -a /etc/udev/rules.d/60-st-linkv2.rules
sudo udevadm control --reload-rules
To connect to STM32F1xx ARM Cortex M3 micro-controllers I use OpenOCD:
openocd --file interface/stlink-v2.cfg --file target/stm32f1x.cfg

Open On-Chip Debugger 0.10.0-dev-00189-g554313b (2016-01-12-10:52)
Licensed under GNU GPL v2
For bug reports, read
	http://openocd.org/doc/doxygen/bugs.html
Info : auto-selecting first available session transport "hla_swd". To override use 'transport select <transport>'.
Info : The selected transport took over low-level target control. The results might differ compared to plain JTAG/SWD
adapter speed: 1000 kHz
adapter_nsrst_delay: 100
none separate
Info : Unable to match requested speed 1000 kHz, using 950 kHz
Info : Unable to match requested speed 1000 kHz, using 950 kHz
Info : clock speed 950 kHz
Info : STLINK v2 JTAG v17 API v2 SWIM v4 VID 0x0483 PID 0x3748
Info : using stlink api v2
Info : Target voltage: 3.534945
Info : stm32f1x.cpu: hardware has 6 breakpoints, 4 watchpoints
I am using cheap clones.
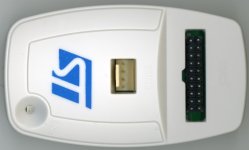
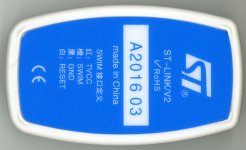
ST-LINK/V2 clone
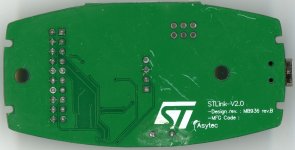
This is a complete rip-off of the ST-LINK/V2.
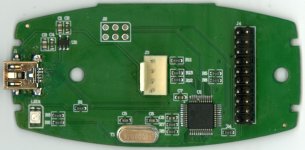
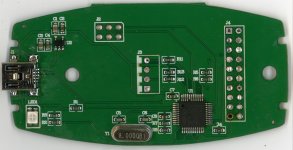
It comes in the same box, with the same cables, the enclosure is the same, even the board name has been taken over (MB936), but the board isn't the same.
The BOM doesn't match with the original.
The original adapter come with ESD protection, protection resistors, and a transceiver to allow operating with target signal levels of 1.65V to 5.5V.
This is completely missing on the clone since the connector pins are directly connected to the micro-controller.
Thus it only supports target signal levels of 3.3V and sometimes 5V since the pins are 5V tolerant.
For $9 you can't expect more, and if you want a cheap adapter I recommend the other ones (see below).
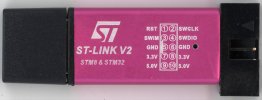
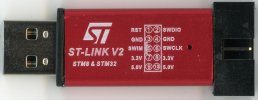
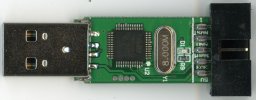
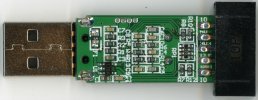
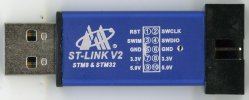
ST-LINK V2 aluminium
These adapters come in a small dongle sized aluminium case. They supports SWD, and SWIM (for STM8), but not JTAG.
At $2.5 they are the cheapest clones you can find.
One trick to get this ridiculously low price is to use STM32F101 micro-controllers.
Compared to the STM32F103 micro-controllers they offer less functionalities, like USB … yet this is a USB dongle!
Well this is because these micro-controllers use the same die, but if not all STM32F103 feature tests pass after production they get packages as STM32F101, but it seems that USB still works well enough.
At least this is my guess.
It would be interesting to check if the other STM32F103 peripherals normally not present on the STM32F101 work as well, but I wouldn't rely on these.
After all, they are probably marked as STM32F101 for a good reason.
Similarly the STM32F103C8 is only rated having 64 kB of flash because it didn't pass the flash test, compared to the 128 kB for the STM32F103CB, but they very often have more (you can verify by read/writing and check for errors).
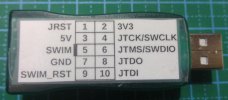
Several board versions exist and it is hard to know what you will get. Always check the pinout on the aluminium case since this also varies.
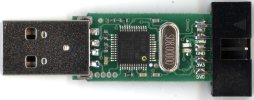
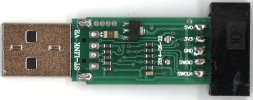
2014-06-22 ST-LINK V2
I've also reversed the schematic for this board.
One other nice trick they used is to have twos LEDs on the same pin (PA9):
- when the pin is set to output high, only one LED lights up
- when the pin is set to output low, the other LED light up
- when set to input floating, both LEDs are off
- when PWM output is used, you can mix the two colors (red and blue) quite well due to the persistence of vision (also because the LEDs are next to each other and the small hole in the case is in the center).
swapped
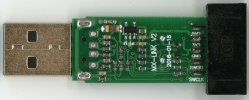
From the outside this looks very similar to the previous one, except that the connector pinout is very different (except for power) and there is only one LED.
No markings are on the board.
2016-01-18 MX-LINK V2
This one has an “M” logo instead of the ST logo, probably corresponding to the “MX-LINK V2” marking on the board.
Baite
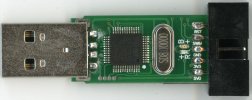
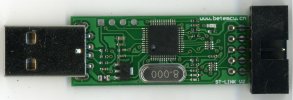
The Baite ST-Link V2 is my favorite clone since it supports JTAG, SWD, and SWIM (for STM8).
The seem to use the same board also for several other programmers, and since the pinout is not on the case I've decided to make my own sticker.
I've also reversed the board layout to get the schematic. The connector pins are all protected with 220 ohms resistors.
There is a newer version marked as “V2A” (under the crystal), but the schematic is pretty much the small with the following changes:
- all pads for the micro-controller are present (there is even solder mask between them)
- they added a SWD port
- the STM32F103C8 has been replaced with a STM32F101CB, but they are treating it as a STM32F103 (like the other cheap dongles)
- the passives are smaller
- the routing is horrible
Black Magic Probe
The Black Magic Probe (aka. BMP) is a quite nice SWJ adapter because it comes with an embedded GDB server.
Thus no need to have an OpenOCD server to control the SWJ adapter.
You can directly connect GDB to this adapter (over USB CDC ACM).
It also comes with a UART port (over a second USB CDC ACM).
This is very useful while developing (for printf debugging).
The hardware comes with some disadvantages though:
- the ARM Cortex SWJ connector uses a small header (not very dupont-wire friendly)
- the separate UART is not always populated (UART is also available on the SWJ connector)
- it is expensive (> $50), but this price is quite reasonable since it supports the project
- it was sold out for quite some time, encouraging me to look for an alternative
Because the firmware is open source it is possible to port it to other hardware, and people already did it.
It has been ported on the blue pill, but I don't find this board as handy as a dongle.
It has also been ported to the ST-Link V2 clone, but then there is no additional UART anymore.
So I decided to port it to the baite.
This has less power pins (who needs 2xGND, 2x5V, 3×3.3V anyway), but provides enough function pins to add UART (and SRST).
To build the firmware (patch integration pending):
git clone https://github.com/tsaitgaist/blackmagic.git
cd blackmagic
git submodule init
git submodule update
git checkout baite-platform
# if you are usgin GCC >= 7
git cherry-pick 2ebcffa2a4911090b43c36594dae6b58d4bb2f27
make
cd src
make clean
make PROBE_HOST=baite
Now we need to re-flash the Baite dongle.
As you can see on the schematic the JTAG and SWD pins of the micro-controller are not connected (there even are no pads on the board for the pins to be soldered on).
But on the back of the board you can find test points so to program the device using the serial bootloader:
| pin | signal |
|---|---|
| 1 (square) | RX |
| 2 | TX |
| 3 | BOOT0 |
| 4 | +5V |
| 5 | GND |
Use any USB to UART converter and connect the corresponding pins to this port. Don't power the Baite dongle over USB since it might then boot the normal application. Instead let the USB to UART converter power it. To start the serial bootloader when powering the dongle you need to set BOOT0 high by connecting it to +3.3V or DTR (or any high signal present on the USB to UART converter).
To flash the Black Magic firmware I used stm32flash. Since the flash is read/write protected you first need to clear these option bits.
# disable flash read protection
stm32flash -k /dev/ttyUSB0
# disable flash write protection
stm32flash -u /dev/ttyUSB0
# erase flash
stm32flash -o /dev/ttyUSB0
# flash the DFU bootloader
stm32flash -w src/blackmagic_dfu.bin -v /dev/ttyUSB0
# flash the main firmware
stm32flash -w src/blackmagic.bin -v -S 0x08002000 /dev/ttyUSB0
Since this adapter is based on an STM32F103C8 micro-controller with 64 kB of flash the DFU bootloader only advertises 56 kB of flash available for the main application. Because the blackmagic firmware exceeds this size it will not be possible to flash it through if the DFU software doesn't ignore this restriction. STM32F103C8 micro-controllers often have 128 kB of flash though, thus it is still possible to flash the blackmagic firmware using the serial bootloader (at address 0x08002000). Verification during flashing ensured the whole firmware has been written successfully.
Unplug and re-plug the Baite dongle. The adapter should be running the main application and two USB CDC ACM ports will appear.
You can re-flash the device from the main application using dfu-util (if you can bring dfu-util to ignore the size restriction):
dfu-util -d 1d50:6018 -s 0x08002000:leave -D blackmagic.bin
Here is the new “BMP Baite” pinout:
| signal | pin | pin | signal |
|---|---|---|---|
| SRST | 1 | 2 | +3.3V |
| +5V | 3 | 4 | JTCK/SWCLK |
| RX | 5 (key) | 6 | JTMS/SWDIO |
| GND | 7 | 8 | JTDO/TRACESWO |
| TX | 9 | 10 | JTDI |
note: the RX pin is pulled up by a 620 ohms resistor. Thus the TX connected to BMP Baite must by strong enough to drive it low (e.g. not like with the CH340 USB to UART converter).
If you connect SRST to the target NRST, it is even possible to reset the target board without having to press on the on-board reset button (of there is any):
gdb --eval-command="target extended-remote /dev/ttyACM0" --eval-command="monitor hard_srst" --eval-command="quit"
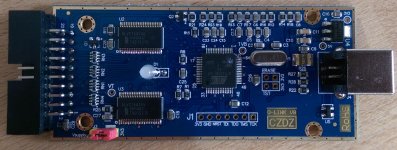
Altera USB-Blaster
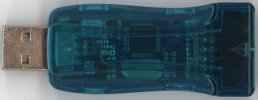
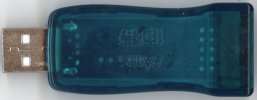
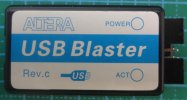
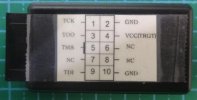
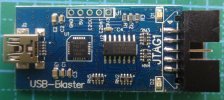
The USB-Blaster is from Altera. It is often used to flash FPGA, but is a general purpose JTAG adapter.
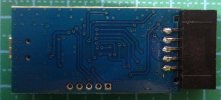
I have a cheap Rev.c clone. The original uses FTDI FT245 and MAX CPLD chips. This one uses a Silicon Labs C8051F321 micro-controller and a 74LVC125 quad buffer, but there are many other clone variants.

First add the rules for normal users to be able to access the device (udev rule based on the VID and PID shown by lsusb). This has only to be done once, before the device is plugged in to be used:
echo -n 'Altera USB-Blaster JTAG adatper' | sudo tee -a /etc/udev/rules.d/60-altera-usb-blaster.rules
echo -n 'ATTR{idVendor}=="09fb", ATTR{idProduct}=="6001", MODE="666"' | sudo tee -a /etc/udev/rules.d/60-altera-usb-blaster.rules
sudo udevadm control --reload-rules
To be able to use it I had to recompile OpenOCD for the USB-Blaster to use libftdi (probable because it's a clone).
git clone http://git.code.sf.net/p/openocd/code openocd-code
cd openocd-code
./bootstrap
./configure --enable-usb_blaster_libftdi
make
sudo make install
cd ..
Else OpenOCD hangs, uses 100% CPU, and has to be killed using -KILL.
openocd --file interface/altera-usb-blaster.cfg

Open On-Chip Debugger 0.10.0-dev-00189-g554313b (2016-01-12-11:26)
Licensed under GNU GPL v2
For bug reports, read
	http://openocd.org/doc/doxygen/bugs.html
Warn : Adapter driver 'usb_blaster' did not declare which transports it allows; assuming legacy JTAG-only
Info : only one transport option; autoselect 'jtag'
adapter speed: 1000 kHz
adapter_nsrst_delay: 100
jtag_ntrst_delay: 100
none separate
cortex_m reset_config sysresetreq
Info : No lowlevel driver configured, will try them all
Info : Altera USB-Blaster II found (Firm. rev. = 6��)
Info : This adapter doesn't support configurable speed
openocd --debug 3 --file interface/altera-usb-blaster.cfg

...
Debug: 385 845 tcl.c:497 handle_nand_init_command(): Initializing NAND devices...
Debug: 386 845 command.c:145 script_debug(): command - ocd_command ocd_command type ocd_pld init
Debug: 387 845 command.c:145 script_debug(): command - ocd_pld ocd_pld init
Debug: 389 846 pld.c:207 handle_pld_init_command(): Initializing PLDs...
Now you can also use it, here with an STM32F1 micro-controller:
openocd --file interface/altera-usb-blaster.cfg --file target/stm32f1x.cfg

Open On-Chip Debugger 0.10.0-dev-00189-g554313b (2016-01-12-16:26)
Licensed under GNU GPL v2
For bug reports, read
	http://openocd.org/doc/doxygen/bugs.html
Warn : Adapter driver 'usb_blaster' did not declare which transports it allows; assuming legacy JTAG-only
Info : only one transport option; autoselect 'jtag'
adapter speed: 1000 kHz
adapter_nsrst_delay: 100
jtag_ntrst_delay: 100
none separate
cortex_m reset_config sysresetreq
Info : No lowlevel driver configured, will try them all
Info : usb blaster interface using libftdi
Error: unable to get latency timer
Info : This adapter doesn't support configurable speed
Info : JTAG tap: stm32f1x.cpu tap/device found: 0x3ba00477 (mfg: 0x23b, part: 0xba00, ver: 0x3)
Info : JTAG tap: stm32f1x.bs tap/device found: 0x16410041 (mfg: 0x020, part: 0x6410, ver: 0x1)
Info : stm32f1x.cpu: hardware has 6 breakpoints, 4 watchpoints
SEGGER J-Link
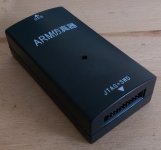
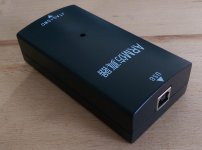
The O-Link-ARM V8 is a SEGGER J-Link clone.
It supports JTAG, SWD, SWO, RTCK, and voltage reference. That makes it the most complete JTAG adapter I have.
tricks
scan chain
JTAG devices are called Test Access Points (TAP). One micro-controller can have several TAPs, by chaining them. Devices with TAPs can also be chaining. But each TAP has an identity (IDCODE) and can be selected individually.
Thus it sometimes is useful to just list the TAPs available on a chain to know which devices are present.
This is easily done with urJTAG (here with the USB Blaster):
jtag

UrJTAG 0.10 #2007
Copyright (C) 2002, 2003 ETC s.r.o.
Copyright (C) 2007, 2008, 2009 Kolja Waschk and the respective authors

UrJTAG is free software, covered by the GNU General Public License, and you are
welcome to change it and/or distribute copies of it under certain conditions.
There is absolutely no warranty for UrJTAG.

warning: UrJTAG may damage your hardware!
Type "quit" to exit, "help" for help.

jtag> cable UsbBlaster
Connected to libftdi driver.
jtag> detect
IR length: 9
Chain length: 2
Device Id: 00111011101000000000010001110111 (0x3BA00477)
  Unknown manufacturer! (01000111011) (/usr/share/urjtag/MANUFACTURERS)
Device Id: 00010110010000010000000001000001 (0x16410041)
  Unknown manufacturer! (00000100000) (/usr/share/urjtag/MANUFACTURERS)
OpenOCD also scans the chain if no target is provided (the adapter still need to be defined):
openocd --file interface/altera-usb-blaster.cfg

Open On-Chip Debugger 0.10.0-dev-00189-g554313b (2016-01-12-16:26)
Licensed under GNU GPL v2
For bug reports, read
	http://openocd.org/doc/doxygen/bugs.html
Warn : Adapter driver 'usb_blaster' did not declare which transports it allows; assuming legacy JTAG-only
Info : only one transport option; autoselect 'jtag'
Info : No lowlevel driver configured, will try them all
Info : usb blaster interface using libftdi
Error: unable to get latency timer
Info : This adapter doesn't support configurable speed
Warn : There are no enabled taps.  AUTO PROBING MIGHT NOT WORK!!
Info : JTAG tap: auto0.tap tap/device found: 0x3ba00477 (mfg: 0x23b, part: 0xba00, ver: 0x3)
Info : JTAG tap: auto1.tap tap/device found: 0x16410041 (mfg: 0x020, part: 0x6410, ver: 0x1)
Warn : AUTO auto0.tap - use "jtag newtap auto0 tap -irlen 4 -expected-id 0x3ba00477"
Warn : AUTO auto1.tap - use "jtag newtap auto1 tap -irlen 5 -expected-id 0x16410041"
Warn : gdb services need one or more targets defined
0x3ba00477 corresponds to the Cortex-M3 TAP, and 0x16410041 to the boundary scan TAP, as documented in the STM32F1xx reference manual.
While the ST-Link v2 is mainly meant to be used as SWD adapter, it also supports JTAG. Both are implemented with the High Level Adapter (HLA) driver. But it seems scan chain is not supported by the HLA.
openocd --file interface/stlink-v2.cfg -c "transport select hla_jtag" -c "adapter_khz 100"

Open On-Chip Debugger 0.10.0-dev-00189-g554313b (2016-01-12-16:26)
Licensed under GNU GPL v2
For bug reports, read
	http://openocd.org/doc/doxygen/bugs.html
hla_jtag
adapter speed: 100 kHz
Info : clock speed 100 kHz
Error: BUG: current_target out of bounds

